In the solid modeling approach, Fidelity Pointwise creates database models and quilts while importing the initial CAD data (File, Import, Database). Models are topological CAD entities that allow for watertight meshing over gaps and cracks existent in the underlying geometry. Quilts, on the other hand, are meshing regions defined at the CAD level.
Tip: Sometimes after import, the database model does not contain all of the feature edges desired for meshing (for instance, there may not be a quilt boundary along the leading edge of the wing if the upper and lower portions are represented with a single surface). Use the Trim Geometrically command to split the existing quilts and create additional feature edges.
The recommended starting point to use the Assisted Quilt Assembly command is a watertight database model that contains all desired feature edges. Once these initial conditions are met, the command is designed to define a quilting topology suitable for Automatic Surface Mesh in a semi-automated manner. The objective of this command is to provide multiple workflows for editing quilt topology within one tool that can be combined or used interchangeably to quickly achieve the desired quilting topology.
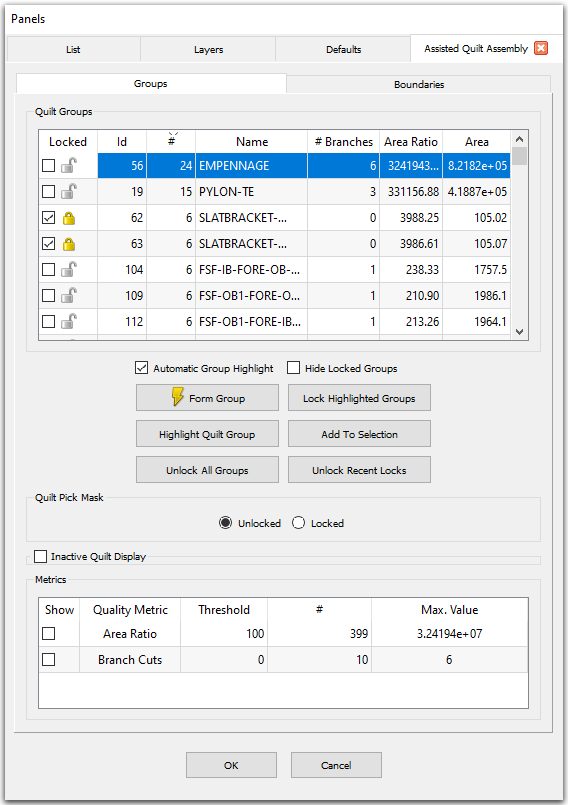
Upon invoking this command, you will be presented with the Assisted Quilt Assembly panel shown above. The panel is split into two tabs: Groups and Boundaries.
Quilt groups are formed automatically using a flood fill algorithm that observes how quilt boundaries are classified on the Boundaries tab. The algorithm floods past boundaries that are marked as Open and stops at boundaries marked as Blocking. Changes made on either tab automatically updates the other. For instance, manually creating a new quilt group on the Groups tab causes the outer boundaries of the group to be marked as blocking and the interior boundaries to be marked as open on the Boundaries tab. Conversely, changing how a boundary is classified on the Boundaries tab causes the flood fill to be recomputed and the quilt groups on the Groups tab to be updated. Quilt groups that have been locked are not affected by subsequent changes on either tab.
Note: At this time, Assisted Quilt Assembly only assembles the quilts, it does not also assemble the quilt boundaries. After assembling your quilts using Assisted Quilt Assembly, it is recommended to assemble the quilt boundaries using Assemble Quilts prior to creating your surface mesh in Automatic Surface Mesh.
The general workflow for using Assisted Quilt Assembly is as follows:
For more on Assisted Quilt Assembly, choose a topic below: