Description
The Groups panel provides tools for viewing, creating, and locking groups of quilts to be assembled. It also provides quality metrics for each quilt group that can be used to help determine if manual intervention is necessary.
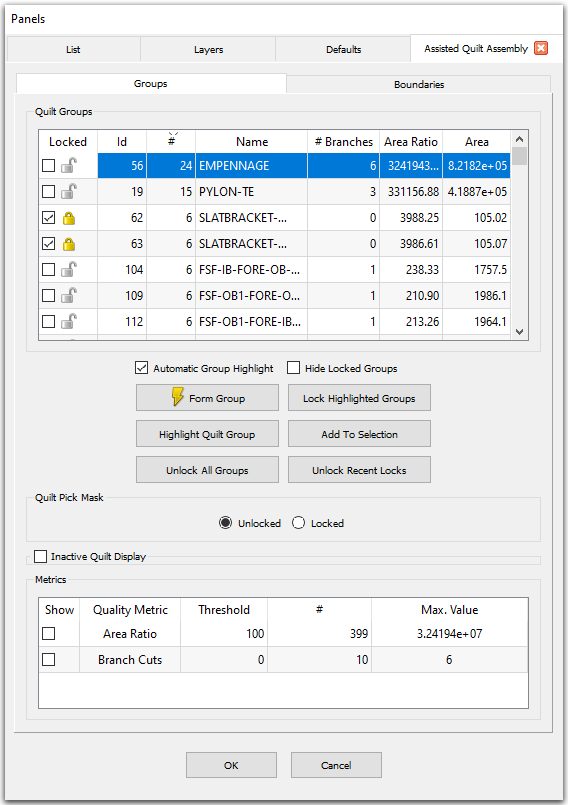
The Quilt Groups table shows how quilts are currently grouped for assembly and
consists of seven columns. All columns are read-only except
the Locked and Name columns. The Locked column contains a checkbox
for locking the quilt group and an icon indicating its current status: unlocked
(![]() )
or locked
(
)
or locked
(![]() ).
The Name column is read-only until the group is locked, at which point it can be
edited to specify the desired quilt name for the assembled quilt. The Id column
contains a unique id for each quilt group and the # column contains the number of
quilts in the group.
).
The Name column is read-only until the group is locked, at which point it can be
edited to specify the desired quilt name for the assembled quilt. The Id column
contains a unique id for each quilt group and the # column contains the number of
quilts in the group.
Tip: The Quilt Groups table can be sorted by any of the columns. It is recommended to start by sorting by the # Branches, Area Ratio, or Area columns since groups with branch cuts, high area ratios, or very small areas likely need intervention.
Note: Right-clicking on one of the rows in the Quilt Groups table brings up a menu with the option Zoom To Group. This can be used to quickly locate quilt groups in the Display window.
The last three columns in the Quilt Groups table provide metrics about each quilt group. The # Branches column shows how many branch cuts are currently in the group and indicates that intervention via the Boundaries tab may be warranted. The Area Ratio column shows the maximum area ratio between adjacent quilt groups. Groups with a high area ratio may also need further investigation. The Area column shows the total area of the quilts within the group.
Tip: All selection tools are available for use when working on the Groups tab of Assisted Quilt Assembly. This includes the new Select Similar selection tools available in the Selection toolbox, which can be used to quickly select similar quilts based on geometric properties for forming a new quilt group.
Below the table are a group of checkboxes and buttons that aid in creating and locking groups. When checked, Automatic Group Highlight highlights the selected quilt's group in both the Display window and the Quilt Groups table. Hide Locked Groups can be used to hide the locked groups in the Quilt Groups table. By default, Automatic Group Highlight is checked and Hide Locked Groups is unchecked.
Tip: There are actually two shortcuts available on each tab of Assisted
Quilt Assembly. On the Groups tab, the lightning bolt
(![]() )
indicates that the Ctrl+F shortcut can be
used to perform the Form Group action. However, Lock Highlighted Groups
has a shortcut too: Ctrl+G!
)
indicates that the Ctrl+F shortcut can be
used to perform the Form Group action. However, Lock Highlighted Groups
has a shortcut too: Ctrl+G!
Form Group can be used to form a new group from the currently selected quilts and Lock Highlighted Groups can be used to lock any groups currently highlighted in the Quilt Groups table. Both actions have associated shortcuts: Ctrl+F for Form Group and Ctrl+G for Lock Highlighted Group. When Quilt Pick Mask is set to Locked, Lock Highlighted Groups becomes Unlock Highlighted Groups and can be used instead to unlock any groups highlighted in the Quilt Groups table.
Highlight Quilt Group can be used to highlight the currently selected quilt's group in the table (note that this happens automatically if Automatic Group Highlight is checked). Add To Selection can be used to add the highlighted group's quilts to the current selection. Unlock All Groups can be used to unlock all locked groups and Unlock Recent Locks can be used to quickly undo the most recent locking action.
Quilt Pick Mask and Inactive Quilt Display
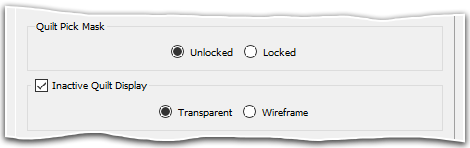
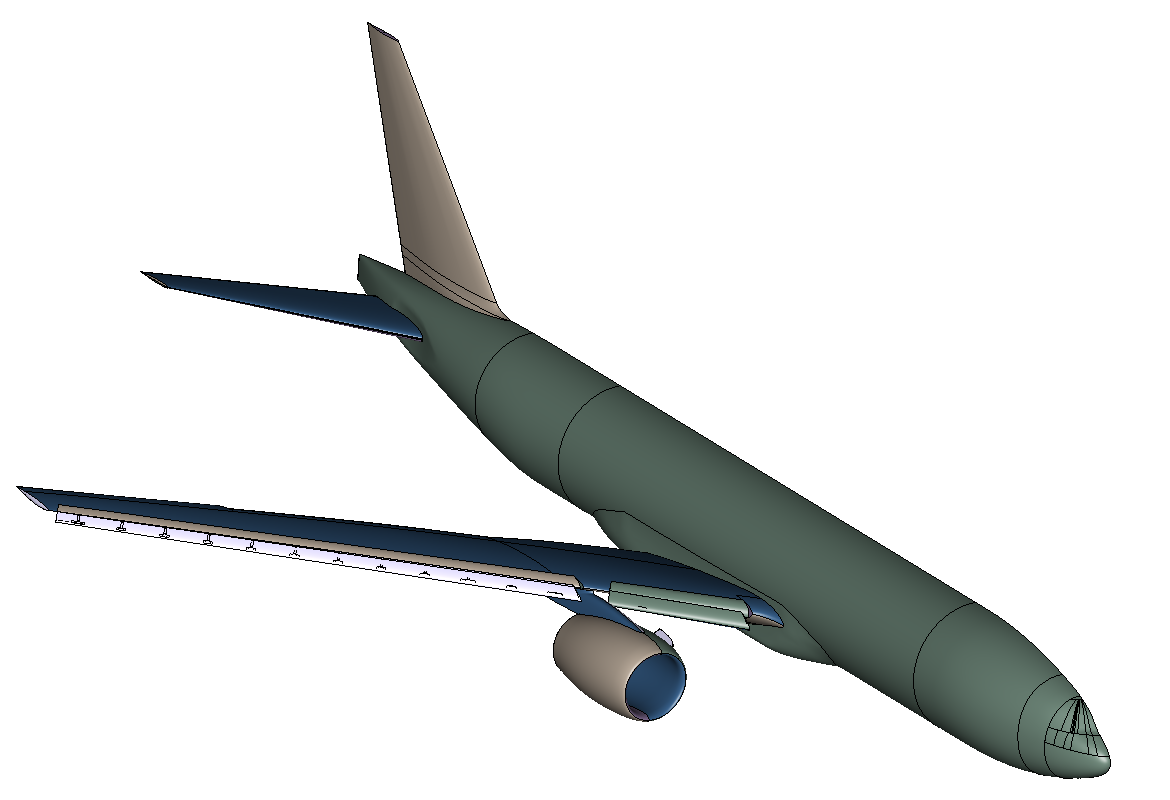
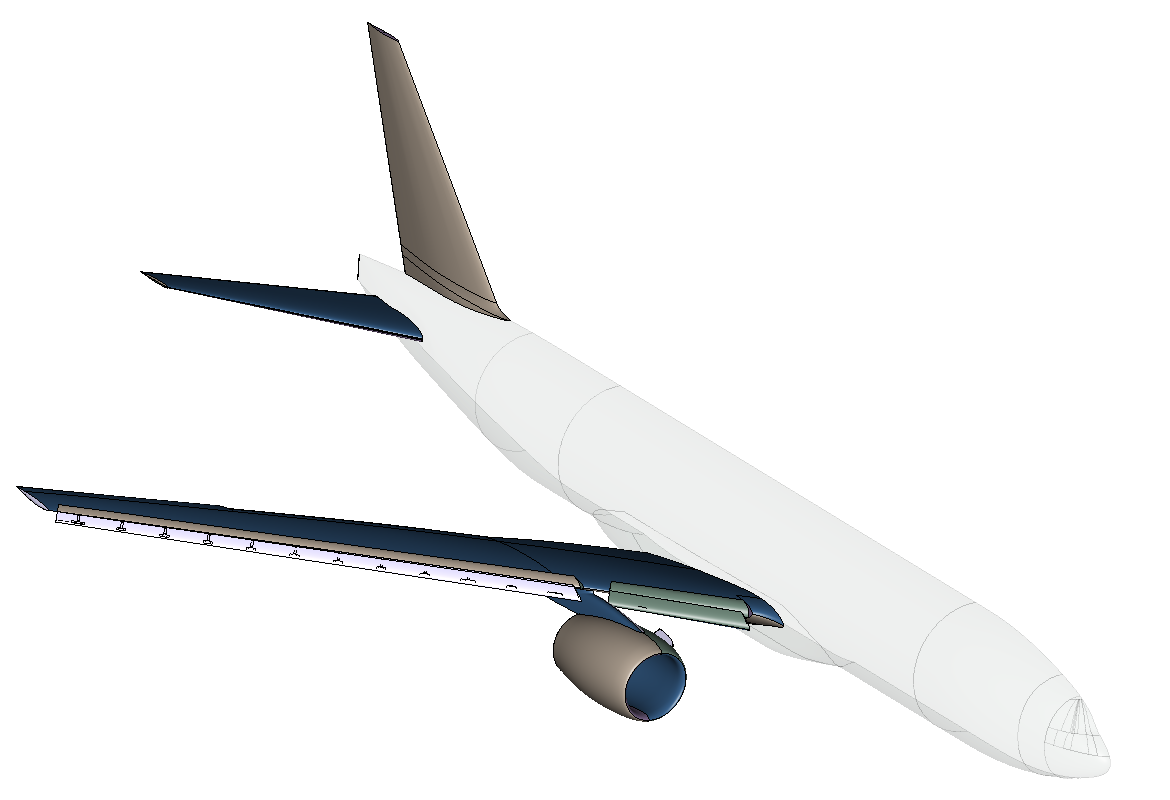
The Quilt Pick Mask frame controls whether unlocked or locked quilts are available for selection in the Display window. By default, Quilt Pick Mask is set to unlocked. The Inactive Quilt Display frame can be used to control the rendering of inactive quilts. Inactive quilts are those not currently selectable (i.e. if Quilt Pick Mask is set to Unlocked, the inactive quilts are the locked quilts). Active quilts are always rendered in an opaque shading (as seen in the image above). Inactive quilts can either be rendered in a Transparent shading (default) or Wireframe.
Metrics
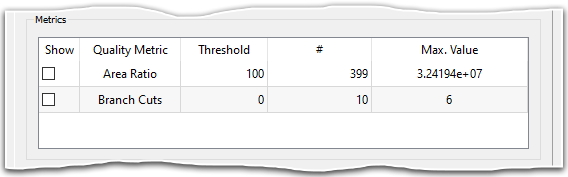
The Metrics table displays quality metrics for the current set of quilt groups. The table consists of five columns:
- Show: This column controls the visualization of groups that violate the defined metric threshold (see the Threshold column below). When enabled, groups that are in violation are highlighted in the Display window in red.
- Quality Metric: This column displays the quality metric being examined.
Note that the fields in this column are read-only. This table contains the following quality
metrics:
- Area Ratio: This metric has a default threshold value of 100 and is defined as the maximum ratio of the quilt group's area to that of the adjacent groups.
- Branch Cuts: This metric has a default threshold value of 0. A branch cut occurs when all boundaries adjacent to one end of a Blocking boundary are classified as Open.
Tip: Branch cuts are usually the result of a few quilt boundaries being incorrectly identified by the automatic boundary classification algorithm. The best way to remediate branch cuts is to enable Show Branch Ends on the Boundaries tab and toggle the offending boundaries to the correct classification.
- Threshold: This column displays the threshold values for each quality metric. Note that the fields in this column are populated with default values that can be edited and replaced with user-defined values more suitable to the problem at hand. The threshold values specified in this column are used to determine which quilt groups violate the different quality metrics.
- #: This column reports the number of quilt groups that are in violation of each Quality Metric according to their respective Threshold values.
- Max. Value: This column reports the maximum value computed for each
Quality Metric. Additionally, you can right click your mouse on each field in this
column to reveal a list with three options:
- Zoom To Groups: Use this option to zoom to the groups with the maximum extrema value of the corresponding Quality Metric.
- Highlight Groups: Use this option to highlight the groups with the maximum extrema value of the corresponding Quality Metric. This option is also available when right clicking on the # column and can be used to highlight all groups that violate the threshold. Note that the highlight may be difficult to see if the Show column is checked.
- Zoom To and Highlight Groups: Use this option to zoom to and highlight the groups with the maximum extrema value of the corresponding Quality Metric.