Trim Geometrically provides controls for splitting quilts along straight parametric or projected lines and offers several modes of operation for accomplishing this. Trim Geometrically requires a selection of quilts (or alternatively, select the model as a shortcut for selecting all quilts within the model. Only the selected quilts can be modified while in the task, quilts not selected prior to entering Trim Geometrically will not be modified by any actions performed within the task.
Tip: When using the Bisect or One Point modes, you can optionally extend splits to adjacent quilts within the task. You can preserve quilts that you do not want to be split by simply not selecting them when you enter the task.
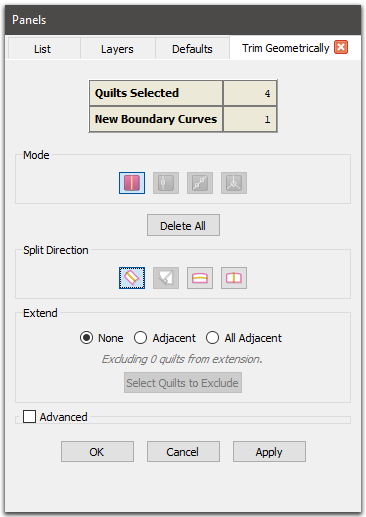

At the top of the Trim Geometrically panel is a table which shows how many quilts are selected (i.e. are active within the task) and how many new boundary edges will be created if the currently defined splits are applied.
Tip: If you need to bisect quilts, you have two options. You can use the Bisect Quilts
(![]() ) toolbar command
to quickly bisect the selected quilts using the Curvature split direction.
Alternatively, you can enter the Trim Geometrically task, which gives you more control over the
Split Direction, allows you to preview the split, and offers the option to extend
splits to adjacent quilts.
) toolbar command
to quickly bisect the selected quilts using the Curvature split direction.
Alternatively, you can enter the Trim Geometrically task, which gives you more control over the
Split Direction, allows you to preview the split, and offers the option to extend
splits to adjacent quilts.
Note: When using the Bisect mode, you can use any of Fidelity Pointwise's selection tools to select quilts for splitting, including the new Select Similar tools!
Caution: Bisect mode is intended to be used to split quilts that are rectangular in shape roughly down the middle. However, other shaped quilts may also be eligible for bisection if they have a single underlying trimmed surface an no internal loops (i.e. no holes). In this case, the center of the quilt is computed as the average of all of the quilt's corner points, which is unlikely to coincide with the center coordinates in parametric space (U=0.5, V=0.5).
If you need the center point to align exactly with the parametric center, it is recommended to instead use One Point mode and explicitly set the UV coordinates of the selected point using the Point Placement frame.
Note: Once a point has been placed on a quilt, it and any subsequent points needed to define the split are constrained to that quilt. Since splits for Star mode can be defined using an arbitrary number of points, you must use the Save Split button to signify that you are finished defining the current split.
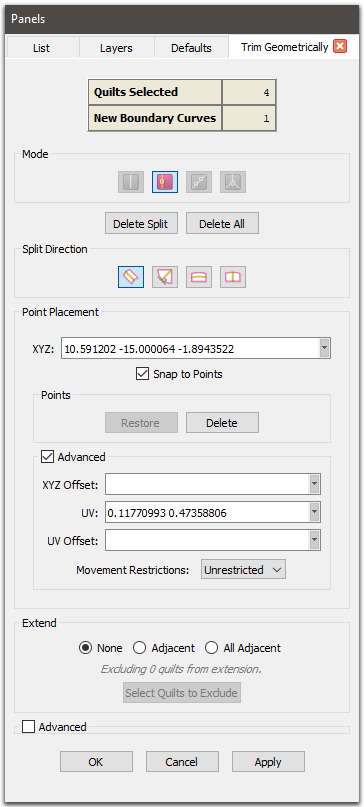
Below the Mode frame are several action buttons which change depending on the mode selected:
The Split Direction frame allows you to control the split direction for Bisect and One Point modes. Note that the split direction applies to all defined splits. There are four options for Split Direction:
Note: The Split Direction applies to all currently defined splits. If you need to split quilts in both directions and cannot accomplish this in one operation using the Curvature or Orthogonal directions, then perform the desired splits in two operations, making use of the Apply button.
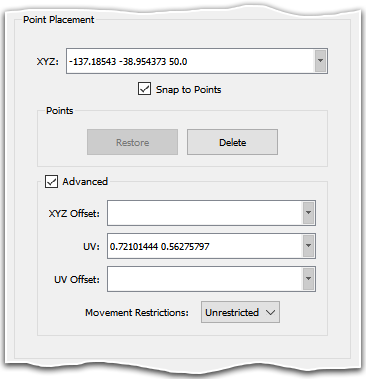
The Point Placement frame is available for all modes that require point selection (One Point, Two Points, and Star). The controls within this frame are common to other tasks within Fidelity Pointwise and are fully described in the Point Placement section of this User Manual.
Tip: The options within the Point Placement can be used not only to specify precise locations for new points, but also for updating the location of existing points. To do the latter, first Ctrl+click on the desired point's icon then specify the new location using the Point Placement frame.
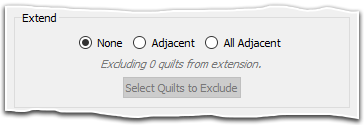
The Extend frame provides controls for extending splits into adjacent quilts when using the Bisect or One Point modes. There are three options for extension:
Use the Select Quilts to Exclude button to enter into a selection mode where you can select quilts that you do not want to be included for extension. This prevents any splits from extending into the selected quilts, however these quilts can still be split manually, if desired. Once you have made your selection, press End Selection to exit the selection mode.
Caution: Even though you might specify splits along similar parametric lines for adjacent quilts, slight differences in parametrization can cause the shared quilt boundary to be split at two different locations, resulting in a very small boundary edge. If this happens, increase the Merge Tolerance so that the algorithm recognizes both splits need to share a common location.
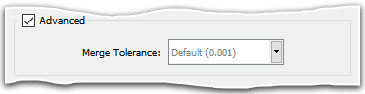
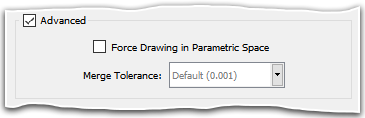
The Advanced frame provides additional, more advanced controls for defining splits.
Use Force Drawing in Parametric Space to specify that the split lines be drawn in
parametric space instead of projected onto the surface. Force Drawing in Parametric
Space is unchecked by default.
Merge Tolerance is the tolerance used to determine if two split locations on a quilt
boundary should be merged. The
default value for Merge Tolerance is based off of the
Model Size and is displayed in the text field in
gray text. To change the Merge Tolerance, simply enter a new value. Press the
![]() icon to clear the field and return to
the using the default value.
icon to clear the field and return to
the using the default value.