Select, Mask opens the Mask panel, which gives more detailed control over the selection mask than the Mask toolbar implementation provides.
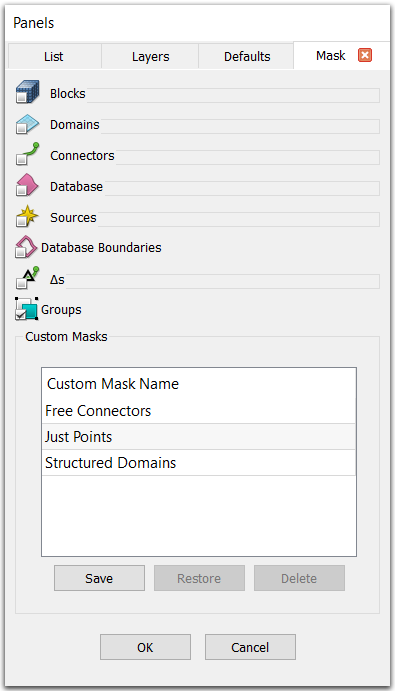
Other than Database Boundaries and Groups, all mask options are in frames which are closed by default. Simply click the checkbox for that entity type to expand the frame. Entity type options that are checked in the Mask panel can be selected, while entity type options that are not checked cannot be selected.
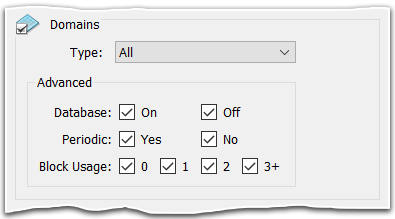
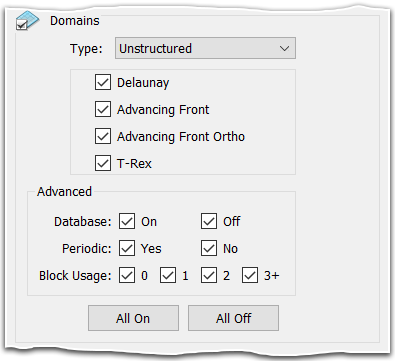
Selecting a specific Type for blocks and domains expands the masking options further to allow even finer selection control.
Note there is some interaction between the Mask panel and the Mask toolbar. If some of the entities in a basic entity type are checked and some are not, the corresponding toolbar button is displayed with a filled square rather than a checkmark. This indicates that the particular entity type is neither all on nor all off. For instance, if unstructured blocks are checked on and structured blocks are checked off in the Mask panel, the checkbox next to the block symbol in the Mask toolbar is filled as shown below.

Likewise, Mask toolbar actions affect the state of the checkboxes in the Mask panel. In the example above, if the checkbox next to the block symbol is checked, all of the block types will become selectable and the corresponding checkboxes in the Mask panel will have checkmarks in them.
Tip: Use the Ctrl meta key while clicking on one of the Mask toolbar icons to quickly isolate that mask.
Similar interaction also occurs between the Mask toolbar and the List. That is, if the checkbox next to the block symbol is unchecked, none of the blocks will be selectable in the List. Note that when the Mask is checked on for database boundaries, they can only be seen and selected in the Display window and are not available in the List panel.
Tip: If you frequently customize your mask, consider saving the settings as a custom mask and adding it to your toolbar! If your customization is to isolate models, quilts, or database curves, there is no need to create a custom mask as these are already additional masks that can be added to your toolbar in the Customize panel.
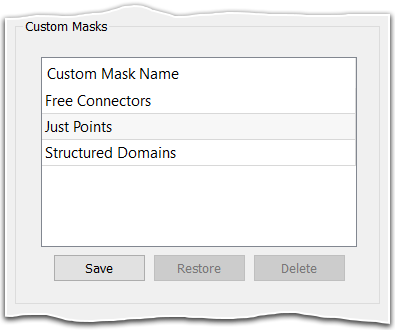
The Custom Masks frame allows you to save and manage custom masks. Press Save to save the current mask settings as a new custom mask. This creates a new entry in the table with a default name. Double click on the name to change it. Use the Restore button to restore the selected custom mask settings or use the Delete button to delete the selected custom mask.
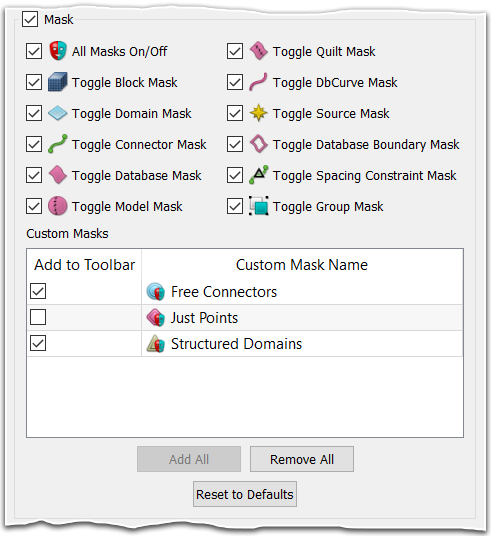
Once a custom mask has been saved in the Mask panel, it is available to add to your toolbar via the Customize panel. You must select an icon for a custom mask in order to add it to the toolbar. This can be accomplished by double-clicking in the Custom Mask Name column or checking the box in the Add to Toolbar column (if an icon has not yet been selected). Both actions bring up the Select Mask Icon dialog.

Check the box in the Add to Toolbar column to add a custom mask to the toolbar or uncheck the box to remove a custom mask from the toolbar. Use the Add All button to add all custom masks to the toolbar and the Remove All button to remove all custom masks from the toolbar. Note that the Add All button is only available once icons have been selected for all custom masks.