Description
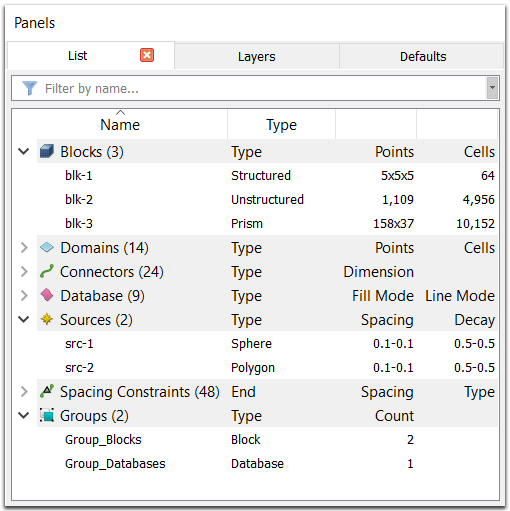
The List panel provides both selection functionality and entity reference information for the following entity types: blocks, domains, connectors, database, sources, spacing constraints, and groups. The only exception are database boundaries which can only be seen and selected in the Display window, subject to Mask settings.
Select the List tab of the Panels to see entities grouped by type and designated with their corresponding entity type icon. Each group can
have its portion of the list expanded or closed as desired to facilitate selection. Expand a
closed entity list by placing the cursor over the
![]() next to the
entity icon and clicking the left mouse button. Reverse this operation by clicking the
next to the
entity icon and clicking the left mouse button. Reverse this operation by clicking the
![]() next to the entity icon of an expanded list. When CAE dimension is set to
2D, the block icon and section will not be shown in the List panel.
next to the entity icon of an expanded list. When CAE dimension is set to
2D, the block icon and section will not be shown in the List panel.
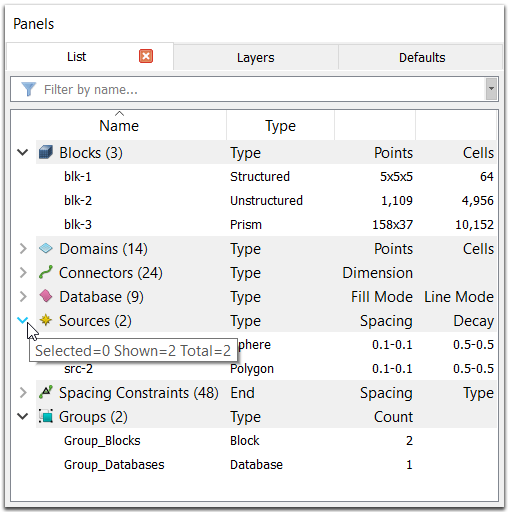
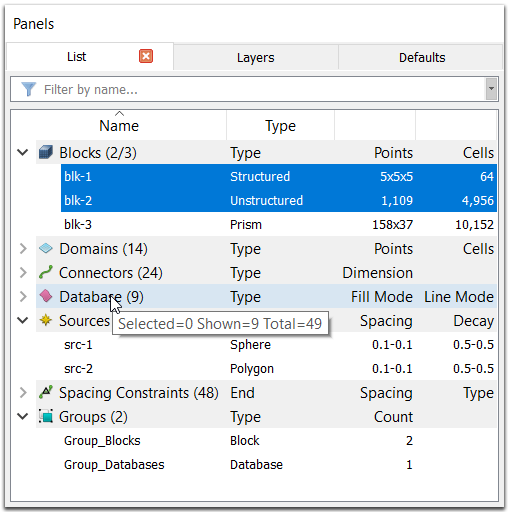
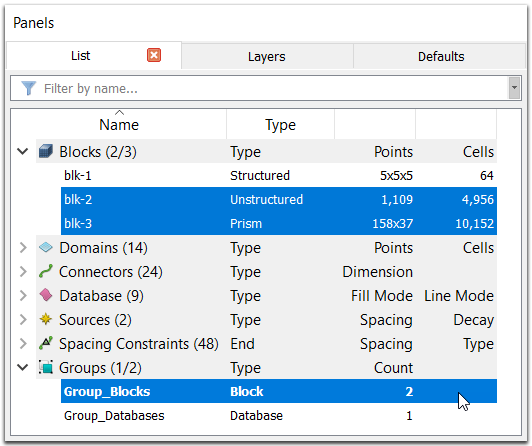
In parentheses next to each entity icon is a number indicating the total number shown for that type. Once entities are selected, this is shown as "number selected/number shown". Hovering the mouse over the header for an entity type will also produce a tooltip showing a third number, the total number of that type of entity in the model including those that are hidden. Refer to the Attributes section for more information.
The List provides basic information about each entity, such as domain name, type, and number of cells or points. Such information can be sorted by clicking on its corresponding header. For example, if you wished to sort all entities by their names, you would click on the Name header in the List. The direction of the arrow in the header indicates whether the sort is in ascending or descending order. Note that the header names for the last two columns are not displayed. This is because these columns are used differently depending on the entity type.
Tip: Often entity selection can be done more efficiently using the List, particularly using the entity icons to select all shown of a type. Using the List also prevents you from having to make any Mask changes since the entities are already segregated by type. You can couple this with filtering by entity name to make selection via the List panel even more efficient!
The List also allows you to quickly modify the name of an entity as long as it is not a spacing constraint. Left-click on an entity, and double click on its name. Type in a new name then press Enter to confirm it.
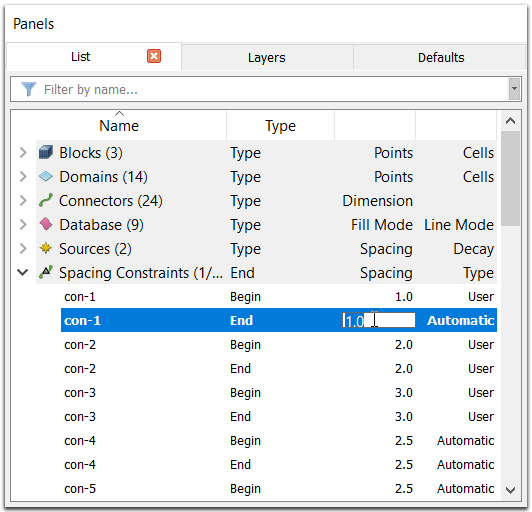
For spacing constraints, the following information is shown in the List: name, end, value and type. Each spacing constraint is associated with one end of a connector (i.e., "con-1") or subconnector (i.e., "con-4.1" that stands for the 1st subconnector of the connector "con-4"). You can set a spacing constraint to a user defined value by double clicking on its value in the List. This will cause the default type "Automatic" to be updated as "User".
If groups are defined in your grid, their names, type, and group member count appear in the List. Note that a group is not a grid or database entity. Instead, it is a shortcut to select multiple entities. That is, selecting a group (e.g. "Group_Blocks" in the image below) in the List also selects its group members (i.e. "blk-2" and "blk-3"). A group is visible in the List as long as at least one of the group members is visible. However, a group will be grayed out and non-selectable until all of the group members are visible and selectable.
Caution: Deleting a group in List also deletes its group members. Deleting a group member, however, simply removes that entity from the group, leaving the group intact with the remainder of its constituents. Always take care when deleting entities!
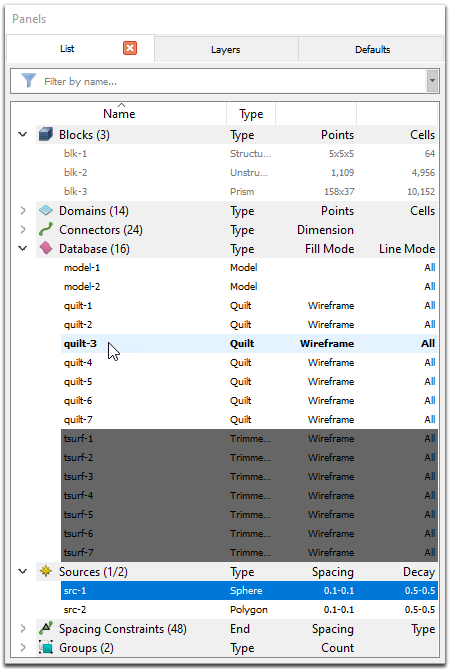
List entities are displayed in one of several different styles based on availability or selection. Entities which are not available for selection due to Mask settings have their text grayed out. As the mouse cursor moves over an entity in the List, its text is highlighted with a bold type-face. Currently selected entities are displayed with a blue background. Hidden entities are displayed with a gray background if View, Show Hidden is enabled, otherwise they are not displayed.
Selection
Selection from the List involves placing the mouse cursor over an entity and clicking the left mouse button. Standard meta keys can also be used for multiple entity selection. Left-click on an entity, and then Shift-click on a second entity to select the entire range between and including the two entities. Or left-click and drag the cursor to select a contiguous portion of the list. Also, left-click on an entity, and then Ctrl-click any number of additional entities for additive selection. Finally, you can click on an entity type header or icon in the list to select all of that type of entity currently shown. You can use the Ctrl meta key in conjunction with clicking the headers for additive selection. Refer to the Selection Methods section for further information on entity selection.
Filtering
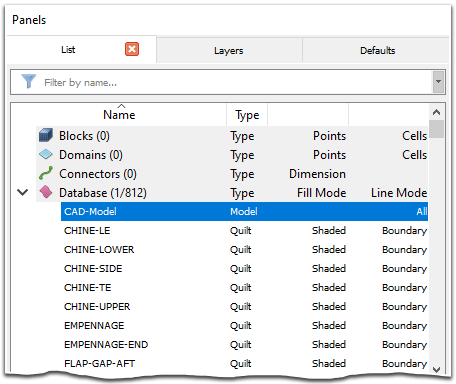
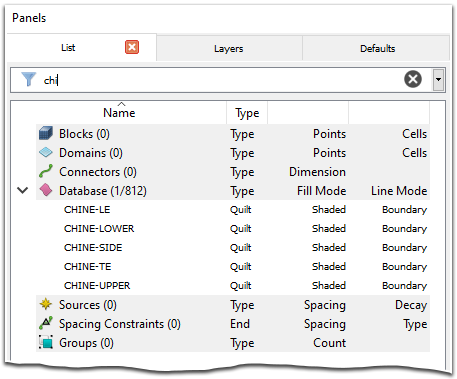
Use the text field at the top of the List panel to filter the List by entity name. Entities whose name partially matches the specified string are shown while entities whose name does not match the string are hidden from the List. Note that filtering the List does not affect the current selection nor does it change what is displayed and selectable in the Display window.
Note: Filtering the List only changes what is displayed in the List. It does not change what is displayed or selectable in the Display window nor does it affect the totals displayed in the header row for each entity type.
In the above image on the left, the model (CAD-Model) is selected prior to applying a filter. It is still selected after the filter is applied (as indicated by the number in the Database header) even though it is no longer shown in the List.
Tip: When a filter is active, the selection methods described in the section above apply only to the filtered list. If you need to select all entities with a common name, just enter the common name in the filter and click the header row in the List to select all of the entities. You can even build more complex filters using regular expressions!
Click the
![]() icon (to the right of the
text field) to quickly clear the filter text. This icon only appears after you begin typing in
the field. Click the
icon (to the right of the
text field) to quickly clear the filter text. This icon only appears after you begin typing in
the field. Click the
![]() icon to disable List filtering. Doing so immediately expands the List to once again
show all entities and changes the icon to
icon to disable List filtering. Doing so immediately expands the List to once again
show all entities and changes the icon to
![]() . Click the icon
again to re-enable List filtering.
. Click the icon
again to re-enable List filtering.